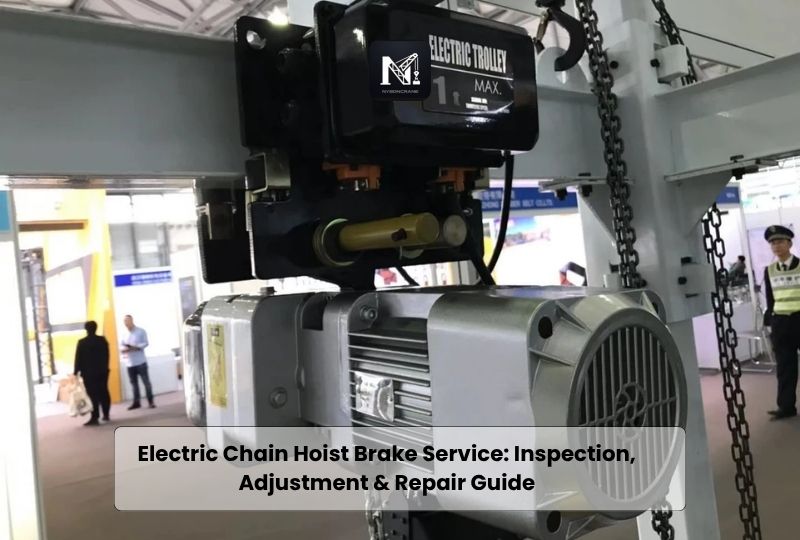
The brake is the single most safety-critical part of an electric chain hoist. It is what holds a suspended load in place the moment power is cut, and it is what prevents drift when the operator releases the control button. When a brake wears down or falls out of adjustment, the risk is not a minor performance issue. It is a load that can creep, drop, or fail to stop exactly where it should.
This guide breaks down how hoist brakes work, why regular service matters, the signs that tell you service is overdue, and the step-by-step process a technician follows to inspect, adjust, and repair one properly.
How the Brake System Works in an Electric Chain Hoist
Most electric chain hoists use an electromagnetic disc brake that is built directly into the motor housing. This design is sometimes called a motor brake or fail-safe brake because it engages the instant electrical power is automatically removed, whether that happens on purpose or during a power failure.
The core components include:
- Friction disc (brake lining): The surface that grips the brake wheel to stop motor rotation.
- Armature plate: Moves against spring pressure to release or engage the brake.
- Brake spring: Provides the constant force that keeps the brake engaged when the motor is not powered.
- Electromagnetic coil: Pulls the armature plate back to release the brake when the motor receives current.
- Brake wheel or rotor: The rotating surface the friction disc presses against.
When the hoist motor is energized, the electromagnet pulls the armature away from the friction disc, releasing the brake so the motor can turn. The moment power stops, spring pressure forces the armature back against the disc, stopping the motor almost instantly. This is what allows a hoist to hold a full load in mid-air without any electrical input.
Why Brake Service Cannot Be Skipped
A hoist brake is a wear component. Every stop and start cycle grinds a small amount of material off the friction disc, and every cycle slightly changes the tension in the brake spring. Over time, three things happen if the brake is left unserviced.
First, the air gap between the armature and the electromagnet grows too large, which weakens the pull needed to release the brake cleanly. Second, the friction disc thins past its wear limit, reducing holding torque. Third, the reduced holding torque allows the load to drift downward after the operator releases the control, which is one of the most common causes of hoist-related incidents on a factory floor or job site.
Routine servicing does not just protect against failure. It also keeps the hoist running at its rated duty cycle, protects the gearbox and motor from strain caused by a dragging brake, and keeps the equipment compliant with workplace lifting standards.
Signs Your Hoist Brake Needs Service
A brake rarely fails without warning. Watch for these indicators during daily or weekly checks.
- Load drifts or creeps down slightly after the control is released
- Delayed stopping when the button is released
- Grinding, squealing, or clicking noise during braking
- Burning smell near the motor housing after repeated lifts
- Uneven or jerky motion when starting a lift
- Visible dust or debris buildup near the brake housing
- Hoist stops later than expected on a downward motion
Any one of these is a reason to stop using the hoist and schedule an inspection before the next lift.
Step-by-Step Brake Inspection and Service Process
1. Isolate power and secure the hoist. Disconnect the hoist from its power source and lock it out before opening any covers. Never inspect a brake while the hoist is under load.
2. Remove the motor cover and inspect the friction disc. Check the disc thickness against the manufacturer’s minimum wear specification, usually printed in the hoist manual. Look for glazing, cracking, or uneven wear across the surface.
3. Measure the air gap. Using a feeler gauge, check the gap between the armature plate and the electromagnet coil face. Compare it to the manufacturer’s specified range, since this gap changes as the friction disc wears down.
4. Check spring tension. A weak or fatigued brake spring reduces holding force even if the friction disc looks fine. If tension has dropped below spec, the spring should be replaced rather than compensated for by over-tightening the adjustment nut.
5. Adjust the brake. If the air gap is out of range, the adjustment nut behind the motor housing is turned incrementally to bring it back within spec. Adjustments should be small and re-measured after each turn, since over-tightening can cause the brake to drag and overheat the motor.
6. Test holding capacity. With the cover reinstalled, test the hoist with a load close to its rated capacity. The brake should stop the load instantly with no measurable drift.
7. Log the service. Record the date, measurements taken, parts replaced, and the technician who performed the work. This log becomes essential for warranty claims, audits, and tracking recurring issues.
Brake Service Intervals
| Usage Level | Visual Check | Full Brake Inspection |
|---|---|---|
| Light or occasional use | Daily | Every 6 months |
| Moderate industrial use | Daily | Every 3 to 4 months |
| Heavy or continuous duty | Before each shift | Monthly |
| All hoists, regardless of use | Ongoing | Full annual inspection |
Duty cycle plays a bigger role in wear rate than calendar time. A hoist rated for a light classification but run continuously will wear its brake far faster than its rated interval suggests, so actual usage should always guide the inspection schedule rather than the calendar alone.
Duty Classification and Standards Reference
In markets that follow Chinese lifting equipment standards, hoist duty is classified from A1 to A8 under GB/T 3811, which defines how frequently a hoist is expected to operate and at what load percentage. This classification directly affects how often the brake should be inspected, since a hoist rated A5 or higher will need more frequent brake checks than one rated A1 or A2 for occasional use. GB 6067 covers general safety requirements for lifting equipment, including braking performance, and is the reference point most manufacturers in this market design their brake systems around.
When sourcing a hoist or comparing specifications, checking which duty classification and safety standard a brake is rated to gives a much clearer picture of expected service life than the load capacity number alone.
Common Brake Problems and Fixes
Brake drags or feels stiff on release. Usually caused by an armature plate that is not retracting fully. Check for debris buildup or a coil that is weakening from age.
Load drifts after stopping. Almost always a worn friction disc or a fatigued spring. Measure both before replacing either.
Burning smell during operation: Often a sign the brake is not releasing fully and is dragging against the rotor while the motor runs. Stop use immediately and inspect the coil and armature gap.
Clicking or grinding noise: Can indicate a cracked friction disc, loose mounting hardware, or debris trapped between the disc and rotor.
Brake engages too slowly: Typically a coil or wiring issue rather than a mechanical one. Check electrical connections before assuming a mechanical fault.
Preventive Maintenance Tips
Keep the motor housing clean and free of dust, since debris accumulation is one of the most common causes of premature brake wear. Use only OEM replacement parts for the friction disc and spring, since aftermarket parts often have slightly different tolerances that throw off the air gap calibration. Avoid using the hoist to test limit switches or as an impact stop, since repeated hard stops accelerate brake wear far faster than normal lifting cycles. Finally, train operators to report any change in stopping behavior immediately rather than waiting for a scheduled inspection.
Manufacturers like Nybon Machinery build their electric hoists with accessible motor brake housings specifically to make routine service faster and reduce hoist downtime for buyers running demanding duty cycles.
Frequently Asked Questions
How often should an electric chain hoist brake be serviced?
A chain hoist brake should be inspected at least every 3 to 6 months for moderate use, and monthly for heavy or continuous duty operations, with a full inspection performed annually regardless of usage level.
What causes an electric chain hoist brake to slip?
A slipping brake is most often caused by a worn friction disc, a fatigued brake spring, or an air gap that has drifted out of the manufacturer’s specified range.
Can a hoist brake be adjusted without replacing parts?
Yes, a hoist brake can often be adjusted by resetting the air gap through the adjustment nut, but this only restores performance temporarily if the friction disc or spring is already near its wear limit.
Is it safe to operate a hoist with a delayed brake response?
No, a hoist with a delayed brake response should be taken out of service immediately, since delayed stopping is a direct sign of reduced holding capacity and increased risk of load drift.
What standard governs hoist brake performance in China-manufactured equipment?
GB 6067 sets the general safety requirements for lifting equipment braking performance, while GB/T 3811 defines the A1 to A8 duty classification that determines expected service frequency.